I spent much of this weekend digging in on some Electrohome G07 monitor chassis repair. I have a bunch of games in the bavacade that use this monitor chassis to power the glorious CRT tubes for these 1980s miracles.
Image of G07 chassis with yoke connector
All told I have at least 7 cabinets that have a G07 chassis. There may be more, but I’m not sure what chassis all my cocktails are using given I never checked, and there are four total: Rally-X, Pleaides, Galaxian, and Moon Cresta.* Along with the Wells Gardner K4600 (at least 6 cabinets have this chassis) the G07 is the most common in the bavacade. That means part of making this hobby sustainable is figuring out how to work on these models given chassis repairs are a big part of keeping games online. I’ve slowly been getting better, but I remain very much an amateur. But even hacks like me have their moments, and this week was one of them. I got two of the three non-working G07s running again, leaving me with just one non-working chassis that I can use as a donor chassis for parts given all the games with G07s are now fully operational. YES!
More detailed image of a G07 chassis
Trusting the process means a lot of troubleshooting, and this weekend I was pretty happy to have committed a bit more and pushing myself to do more extensive diagnostic testing of the various components for things like resistance readings, diode readings, checking if transistors are good, voltage test points, etc. All of this was Greek to me just a couple of years ago, so starting to get my head around this basic troubleshooting before replacing anything is long overdue and pretty rewarding.
The multimeter has proven to be the most indispensable tool of them all
I already talked about the first successful G07 repair this week in my “bavacade Repair log from 6-29-2023,” noting “I was able to repair the Condor G07 chassis that was dead by doing a cap kit, swapping out a new B+ filter cap as well as a horizontal width coil.” The cap kit was done almost a year ago, but I never got it working. Turns out the recent replacement of the B+ filter cap is what brought it back to life. The horizontal width coil was broken, so I soldered a newer one off one of the other two non-working G07 chassis, figuring better to replace the broken one while the board was out. When I re-installed the chassis in Condor it worked, but there was a slight undulation that was annoying me. So, as a test, I tried it in Robotron and the waviness was gone and it worked perfectly, so that’s where it lives right now.
This means I needed to repair one of the other two chassis for Condor, and then I was golden. The two G07 chassis I had both blew the F901 fuses (2.25 AMP @ 250V ) next to the B+ capacitor, which is the biggest capacitor on the board. After discharging the B+ filter,† I replaced the fuses, which needed to be soldered in, and then tested the G07 that came from Pole Position (I defaulted to this one because I had desoldered the horizontal width coil from the other chassis for the first fix). Initially I thought the Pole Position chassis had an issue with the flyback and/or the horizontal output transistor (HOT) given the symptoms when it originally occurred a few weeks back. But after re-soldering the fuse and re-installing in Robotron to confirm as much, there was a total vertical collapse of the heart ![]()
G07 chassis with vertical collapse
That’s a new one, but I’ve read about it on forum posts innumerable times. I figured I’d have to deal with it sooner or later, so I embraced the challenge to broaden my experience—learning is painful! OK, so the first thing I did was look at some of the basic troubleshooting for this, and from what I read it is possibly linked to a few different things, such as an open circuit somewhere, which requires testing each resistor in the 400 series circuit to ensure there are no infinite (OL) ohm readings. It’s also been linked to the x401 and/or X402 trasnsitors, so you wanna check the values there. I’ve read a few cases where the IC501 chip was bad and needs to be replaced, but that seems less likely. That said, the following G07 repair video did have that issue, and it does a great job walking you through common troubleshooting as well as demonstrating how to test the transistors, which was very helpful:
I tested the transistors, and they were both reading at .570, which seems normal. I then tested all the 400 series resistors and some were lower than the specs, but none were open, so not sure they are the issue. I also compared the results on a working G07 and they were fairly similar, here are the results I got for this chassis:
FR401: 69 Ohm
R401: 99 Ohm
R402: 18K Ohm
R403: 3.3K Ohm
R404: 4K Ohm
R405: 12K Ohm
R406: Vertical linearity trim pot
R407: 4.2K Ohm
R408: vertical Height trim pot
R409: 51 Ohm
R410: 6.4 Ohm
R411: 13K Ohm
R412: 13.5K Ohm
R413: 580 Ohm
R414: 3.1K Ohm
R415: 2.6K Ohm
R416: 8K Ohm
R417: 67 Ohm
R418: 1.3K Ohm
R419: 1.9K Ohm
R420: 6.6 Ohm
R421: 5.5K Ohm
R423: 2.4 K Ohm
Some of the readings are low, particularly for R404, R411, R412, R416, R417,R421, and R423, but I got similar low values for another chassis that works just fine, so I “resisted” replacing any resistors just yet given I didn’t find any open circuits, just issues with value range (assuming a low resistor value would not cause the total collapse, but I’m not positive on this). The next test would be the IC501 chip, but I was not entirely sure how to test this chip, still a blindspot for me, and I don’t have a spare regardless, so I let that sit.
There could also be an issue with soldering joints at the yoke connectors on the board but the solder was fine, but still might reflow those. Beyond that, I tested the resistors for R406 and R408 which adjust the vertical height and linearity, and they adjusting values accordingly, so I was hitting a brick wall. I even checked the diodes in the 400 circuit, but all seemed good.
The dark splotch on the flyback is where it burst and started leaking
At this point I decided to step away from the Pole Position chassis, and turn to the other one that wasn’t working. First thing was desolder the horizontal width coil from the chassis I just abandoned and solder it to this one. I already added the new F901 fuse, so with the width coil added and the fuse in I tested it out. The last time it had not powered on at all, whereas this time it powered on and immediately there was smoke coming out of the flyback. It had blown. This, oddly, was very reassuring because at least I knew exactly where the issue was, and I also had an extra flyback that worked. So, I replaced the flyback and tested the game again and voilà this time it worked perfectly, whew! All the work on the other one with no results but a lot of learning, and this one was a simple replacement part swap, I’ll take it every time.
I need another width coil and a working flyback, but once I have them I might even take another shot at the last non-working G07, but given no games are effected I can finally move on to the last chassis repair I need to do, the K4600 for the Centuri Challenger, so until then!
_____________________________________
*I’ve yet to dismantle a cocktail cabinet, but that task will probably be coming soon given some work needed on my Pleiades cocktail cabinet, I don’t trust the adjustable metal legs on that game and want to get them properly lubricated and adjust with the write screws.
† Capacitors are designed to hold a charge, and when you blow the F901 fuse that charge has nowhere to go, which makes these big capacitor dangerous to the touch. Whenever removing this board do not grab it from underneath before discharging the G07 cap. You can do this by using an insulated screw driver that is connected to a ground via an alligator clip to ensure the charge has somewhere to go. To ground it, make sure the screw driver touches the + and – posts, read more on this on the KLOV forums here.
This is just a quick update to document some of the work happening recently in the bavacade. It has a been a bit of catch as catch can given how busy the last month has been with the Reclaim open conference the and coming virtual event in July. That said, I’ve been sneaking in work here and there in the mornings, and as usual it adds up. I already blogged about the Yie-Ar Kung-fu custom cabinet project, and will be a summer long endeavor, but it’s very exciting. I also documented some of my work a couple of week’s ago testing various parts I bought in the US in the “Arcade Therapy” post, so things are definitely moving along.
More recently I have been testing some spare boards I have, namely a spare Make Trax board as well as spare Super Cobra board. This was also part of my attempt to start organizing all my parts and spares in the basement and get some semblance of order. I find testing and labeling when things worked saves me a ton of time, and some of the metadata on the boxes noted that these boards were questions marks. Also, I was looking to test a Crush Roller board in Make Trax I was sure I’d bought and brought to Italy over, but turns out I am either delusional or simply left it in Fredericksburg. Either way, because I’m obsessed I bought another Crush Roller board I found for a decent price in Germany along with a spare Moon Cresta board. The latter board is for the cocktail cabinet in Zach Davis is minding for me in Portland, Oregon, and I want to install and test the high score save kit on this one before shipping it back once I am in New Orleans next month.
The mint Moon Cresta Cocktail machine in residence at Cast Iron Coding’s HQ
Anyway, back to the spare Make Trax and Super Cobra boards. The Make Trax spare works, but the sound is noisy. It’s as if the sound pot is not working correctly and there it is too loud and scratchy, so will need to track that down a new potentiometer (pot) and see if tracing the audio gives me any insight. This board will be the first real PCB work (besides my botched Stargate repair attempts) I’ve attempted in earnest, and I’m hopeful it’s the start of some basic board work.
Stargate Yellow Screen of Death
If it goes well, the second project will be Super Cobra, which has an issue with the high score save kit. There are weird special characters in the high score save (HSS) kit and free play is not working. When I substituted the original roms—this board has several ROMs removed given they are programmed on the HSS kit—and Z80 chip from the working board the special characters went away. That said, there was then a strange rebooting issue with the game that did not happen with HSS kit in, so I’m going to buy new chips and burn the Super Cobra roms (a first for me). After that, I’ll try to track down the random rebooting issue, which is definitely an issue I can isolate to that board, should be fun!
Shot of Super Cobra with weird special characters in high score
As far as other work, I am making headway on monitor chassis repair. I had the spare Hanterex Polo in Cheyenne sent in for diagnosis given the original is stuck in the US on what’s shaping up to be an almost a 6-month wait, which I’m not thrilled about. I’ll keep pushing on the US repair, but in the meantime if the spare board is fixed here in Italy I can finally get this game back online. If that happens, then I’m just one G07 chassis and one K4600 chassis away from having everything running. I was able to repair the Condor G07 chassis that was dead by doing a cap kit, swapping out a new B+ filter cap as well as a horizontal width coil, and the chassis is working pretty well, but there’s a slight undulating wave that Tommaso tells me is good enough, but it’s annoying me, so I do think I need to replace all the adjustment pots, especially for vertical linearity and vertical hold.
In fact, I was certain I bought spare G07 pots, but I can’t find them for the life of me (part of the quest for order undertaken this week), so I’ve been parting out one of my extra, non-working G07 chassis. I’m also waiting on some 1.25 AMP fuses that should come today to try and get the chassis that came out of Pole Position working again. I think this chassis has either a bad flyback or a bad voltage regulator given there has been a recent cap kit done already. I might also need to swap the B+ filter cap. If that works, it will be put in Robotron, which leaves only the K4600 chassis for Challenger (I put Challenger‘s 4600 into Venture to get that game up and running) to repair. I’m not sure what is up there cause I swapped flyback and there was a recent cap kit, so a bit perplexed, but hopefully we some poking around and testing that will be the final piece of the puzzle. This is where the chorus sings, “Hope springs eternal in the bava heart.”
Cracks in the Make Trax control panel overlay
Cracks in the Make Trax control panel overlay
Finally, I have the Make Trax cabinet totally stripped and with Alberto to add wheels because every game will be on wheels sooner than later in the bavacade. The cabinet, overall, is close to mint save the control panel overlay which cracking. When Tim and I were getting Reclaim Arcade up and running I came across an original control panel overlay for this game and snagged it, it was one of the things that came over with the container so I asked Alberto iof he could remove the old one and add this one, and as he says to everything, “No problem!” He’s the best! He removed the old one, which by all accounts from Tim is a totally nightmare, and got it sanded and cleaned up.
Sanded Make Trax control panel ready for the like-new original overlay
After that, he put on the new overlay and it looks like new! So good. Sometimes those things I bought that I thought “Will I use this” are now almost all in use, and that makes me happy.
Alberto’s work on these cabinets continues to blow my mind, this control panel is, indeed, like new thanks to his craftsmanship
I think the next game to go on wheels will be Elevator Action, so will start taking that one apart, and that will mean 16 of the 30 games in the bavacade will be on wheels, and that means I am have crossed the half-way mark, which is encouraging progress! It also means I will have stripped almost every game down to just the cabinet if I manage to get wells on all of them. That’s pretty awesome.
I’m embarking on a new-to-me bavacade adventure, namely working with Bryan Mathers to create custom side art for the 1985 fighter Yie-Ar Kung-Fu. This game was the most popular arcade conversion kit of 1985. What’s a conversion kit? It often refers to a board modification that enables operators to convert an older, less popular game into a brand new title—all without buying a new cabinet. It probably made good sense for the arcade owners back-in-the-day, and such conversions helped the industry recover from the video game crash of 1983. But the conversion kits often meant that the cabinets were never really as iconic as their predecessors, and the first thing to go was usually attention to the art, which was definitely the case with Yie-Ar. The side art was a slap on, rectangular image that does little justice to the various characters you challenge along the way.
Yie-Ar Kung-Fu side art
I got one of those Yie-Ar Kung-Fu conversion kits in a Defender cabinet a few years ago, and recently did some work to clean it up and add wheels. Rather than buying a reproduction sticker for the side art, I thought it would be cool to dream up some custom art for this cabinet. This is something I’ve seen folks do in the hobby, and it can make for an awesome art project. Problem is I’m not a graphic artist, but then I thought of the magical Bryan Mathers, so I reached out and he is game.
Fairly intact original Defender side art under 3 coats of paint
So, the cabinet we will be creating the art for is a previously converted Defender cabinet that has a very distinctive shape. When sanding down the various coats of paint the original art work appeared. What’s more, it was in very good shape! We primed over it as a layer of protection in the event someone wants to reclaim this cabinet in the future.
Defender Cabinet primed and ready for custom art
So we know the shape of the cabinet, and Bryan and I chatted about possible side art, and I was hoping to highlight the different backgrounds which are a cave-based waterfall for level one rounds, and a Japanese palace for level two. So using those backgrounds on the side art somehow would be cool.
Cave-dwelling waterfall background
Japanese palace background
Then I thought of the side art from the Sidam Explorer, which features comic panels with an abstracted, brooding astronaut:
![]()
So amazing, then the idea brewed that we might do 11 unique panels each featuring one of the various characters you fight. perhaps 6 on one side and 5 on the other. Perhaps highlighting the cave fights on one side and the palace fights on another? I don’t know, but it sounded awesome in the moment. Bryan is planning on using a 3-D rendering of a defender cabinet to fit the panels together like a puzzle, and then work within those pieces to see how it all looks in glorious 3D, so wild:
Defender Arcade by Delinx on Sketchfab
I’m not sure if the above model is what Bryan will use, but I really dug the idea of him modelling it all in 3D and building virtually first to figure out how to fit the panels to match the cabinet, see what colors will work, and get a sense of the design in three dimensions, etc. Once we have that all locked-in, I will find a someone here in Italy who can do a hi-res print to vinyl. So, this is the beginning of what will be my first custom art conversion kit that will be a true one-of-a-kind in the bavacade. YEAH!
I’m back from a trip to both Fredericksburg, Virginia for Reclaim Open and after that Long Island, New York for some extended family time. All of that coming off several days in Lisbon, Portugal, so I was feeling the effects of being on the road for a bit. I have a lot to say about Reclaim Open, and that will begin here shortly, but before that I need to ease back onto the blog, so I’ll highlight some of my recent work in the bavacade.
Turns out the arcade work can also do double-duty as a kind of re-entry therapy. My bipolar gets pretty acute when I’m on the road and away from the family for a while. If I’m not mindful my thoughts can begin to spiral. So for this re-entry—before blogging or jumping headlong back into work—I took some time to tinker on a few games. I usually lug a bunch of arcade parts, repaired boards, chassis, etc. back from the US, and this trip was no different.* On top of the random parts, I also retrieved a few game boards I had shipped during my last trip to the US in February (including Sidam’s Condor, Exidy’s Cheyenne, and Nichibutsu’s Moon Cresta). On top of that, I took a few with me from Italy, namely a Moon Patrol bootleg board with sound issues, a Bagman with sprite issues, and my back-up Yie-Ar Kung-fu board. So, in short, a lot of boards to be looked at, and below is the tale of the tape for board repairs:
That’s a fair amount of board work, but as of now there are no bad boards,. This will be a short-lived victory, but I’ll take it.
Next up is monitor chassis repairs. I have two G07 cap kits (Robotron and Condor) I need to do, as well as a K4600 capkit for the Centuri Challenger. After that, the final project is the Hanterx Polo, which has been drawn out way too long, so I’m trying to resolve that sooner than later.
The other work happening has just been some random testing of parts and boards I brought back, such as testing a 15-pin Williams power brick for Make Trax: it works fine. I’ve also been testing boards like Condor (looks and sounds amazing) Bagman (working again and power adjustment fixed the power-induced sprite issue), Dig Dug (works perfectly), and Zach reported back Moon Cresta is all systems go. So Cheyenne, Moon Patrol, and Yie-Ar Kung-fu are the last boards to test, but two out of the three will need to wait until the games are back online. That leaves Moon Patrol, and I’ll be testing that here soon.
This weekend I fell down a repair rabbit hole. I picked up a degaussing coil in the US, and brought it back to add the final touch to Exidy’s Venture (one of my absolute favs) which had a bit of discoloration on the CRT. The degaussing fixed the issue, but soon after the game was freezing and eventually it seemed the monitor was cutting out. When I adjusted voltage the screen came back, but this time with mono-chromatic colors and it was out of sync. Major bummer. I started troubleshooting which lasted deep into Sunday to finally learn the monitor’s fine, but one of the chips that controls the color and sync (chip 13C) needed to have the solder re-flowed. I did that and re-seated everything and the game started working again and looking better than ever. That was a small, but rewarding, win.
It all becomes pretty consuming for me (which is true of most everything I do), but I find that focused attention and tinkering to solve small, elusive problems can be just what the doctor ordered when trying to return to a much needed work/life rhythm. Arcade therapy! But not so much playing the games these days as fixing them which is a really pleasurable, if unexpected, consequence of getting into this hobby.
_______________________________
*I even found all my Dungeons & Dragons maps and guide books feared lost, but that is a post for another day.
I’ve been pretty busy knocking out my to-do list for the bavacade. I created a long one after returning from the US, and I’ve gotten through most of it, so might be a good time to create a log with work done over the past month or so.
![]()
Back of pac-man painted
![]()
Pac-man Multi-game HSS Kit
![]()
High Score Save Kit for Venture
![]()
Cheyenne original ROMs
![]()
Big Blue Capacitor (Atari Power Brick)
![]()
12V Power Switch for LED Marquee Light in Dig Dug
Still to do:
As with the Dig Dug and Venture post, most of this was originally published as part of the bavacade repair log from February 9, 2023. But in service of celebrating the greatest video game of all time, a dedicated permalink to share the Pac-man overhaul love was not too much to ask.
![]()
After fitting Pac-man with the BitKit2, I decided that cabinet needed to be on wheels and the bottom looked over closely given the floor was feeling tenuous under any kind of pressure. There were early signs of wood rot that may have been a result of water damage, although it was definitely not extensive.
![]() Pac-man‘s old floor was feeling its age
Pac-man‘s old floor was feeling its age
I stripped the cabinet down to its bones and sent it out to Alberto, who worked his magic. He replaced the floor entirely, while leaving everything else in tact, and added a base pedestal to hide the new wheels. Once I got it back I taped around the original artwork and painted the cabinet with the Scramble yellow I had left-over from that project, and did some touch-up on the black paint, but otherwise left the original artwork untouched. The yellow from Scramble was matte, which meant the color was a bit muted compared to the original Pac-man yellow.
![]()
![]()
This was probably the fastest I ever completed a strip down, re-build, and re-paint. It was all done in less than a week, including Alberto’s work—which was crazy fast. I took a ton of photos, and you can find them in this Flickr album. I was also racing against time given I had planned travel back to the US, so it was nice to get it done.
![]()
That said, once I returned from the US the matte yellow from Scramble I used for touch-ups was bothering me. So, I got that yellow mixed as glossy, and then re-painted the sides, front, and back of the cabinet with the new glossy paint, and now the difference between the yellow around the original artwork and the yellow I added to clean things up is much harder to notice.
![]()
It’s looking good! I still need to paint the back of this cabinet, which was also yellow. I’ll take care of that once I return. This dot gobbler is the crown of my collection, so it needs to be beautiful! In fact, you can get a better sense of the before and after effect with the two side-by-side images below.
Pac-man after the work
Pac-man before the work
Like the Venture post before it, most of this was originally published as part of the bavacade repair log from February 9, 2023. But in service of searchability and documenting these cabinet overhauls more individually, I’m breaking this out into its own post.
![]()
Broken corner in Dig Dug cabinet
There was a big gouge in the bottom rear corner of the Dig Dug cabinet that was bothering me to no end. The cabinet was otherwise quite solid, and I have to say the seller ensured everything in it was original, which is always nice. One thing that struck me when taking this apart was how well designed the Atari cabinets are. This was the first one I disassembled, and it was the easiest yet by far. I love the way the light and speaker are combined onto one piece of plywood for easy removal.
![]()
Light and speaker mounted unit for Dig Dug cabinet
The coin door setup is also super easy to remove with a genius design that allows you to attach and detach the coin box easily and tighten the door with all bolts seated using attached, movable nuts. When you disassemble enough of these machines you begin to appreciate good design choices.
![]()
Bolt system for coin doors for the Atari Dig Dug cabinet
The cabinet work for this game was a bit more straightforward. Epoxy for the gouged lower corner and for the various imperfections along the trim. I have new t-molding on order, so this game should be mint very soon.
![]()
Some taping of Dig Dug for touch-up paint
There were a few places the cracks in the sides meant I needed to do some touch-up paint work, and the base color of his cabinet is closer to off-white than pure white, so I found myself adding yellow to pure white paint to get a better match, and that was fun. It’s not perfect, but you would need to know what you are looking for in just a few spots to see the difference. It’s approaching perfection for me, so more than passable for most I hope. Also, none of the original artwork was touched, so this was already a pretty impressive cabinet, that just got awesomer!
![]()
Dig Dug After touch-up paint and before light sanding
There are a couple of things I still needed to attend to, and I got around to them after returning from travel. The first task was fixing the marquee light that blows every florescent tube I’ve put in there. I believe it’s the ballast on the light fixture, but I decided to go the easy route for the time being and just attach a 12V switching power supply to convert 120V power line to 12V in order to attach a 12V LED light strip.
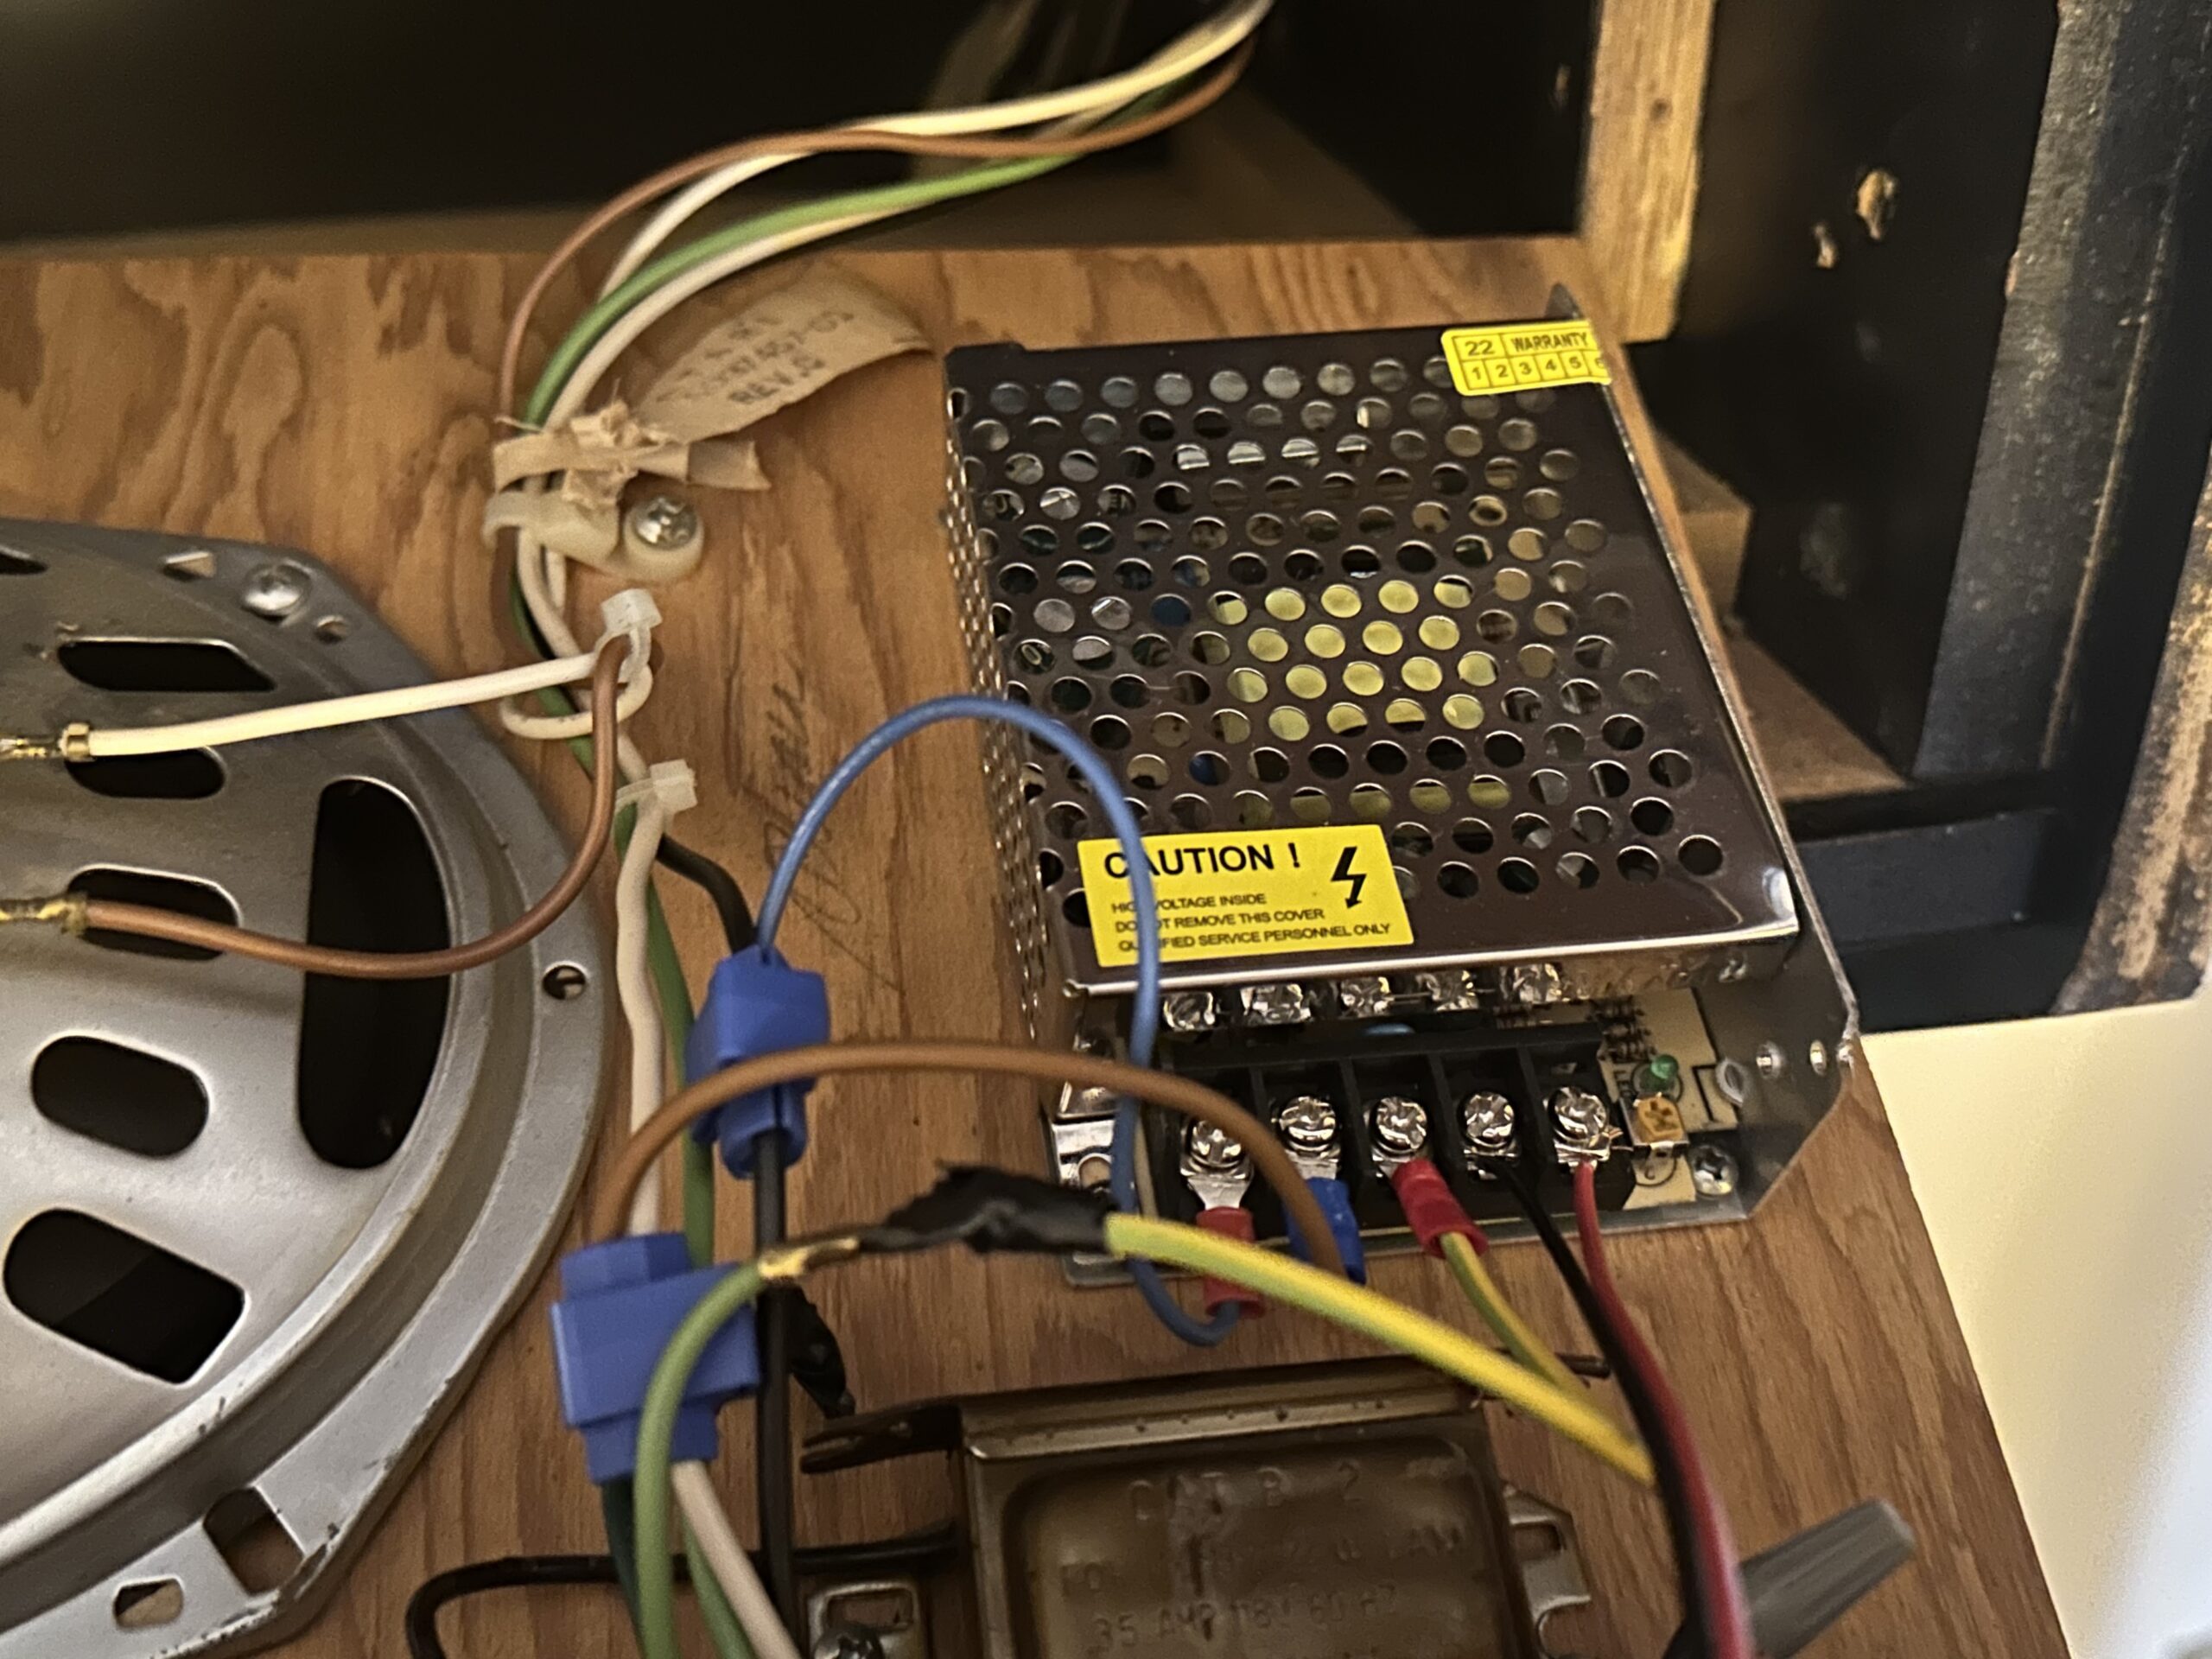
12 volt switching power supply in Dig Dug cabinet to enable LED marquee to work
That worked well, although the light is a bit bright, so I am looking to find some opaque tinted tape to dial down the lumens. Right now I have masking tape as a work-around, but that might not be the best idea ![]()
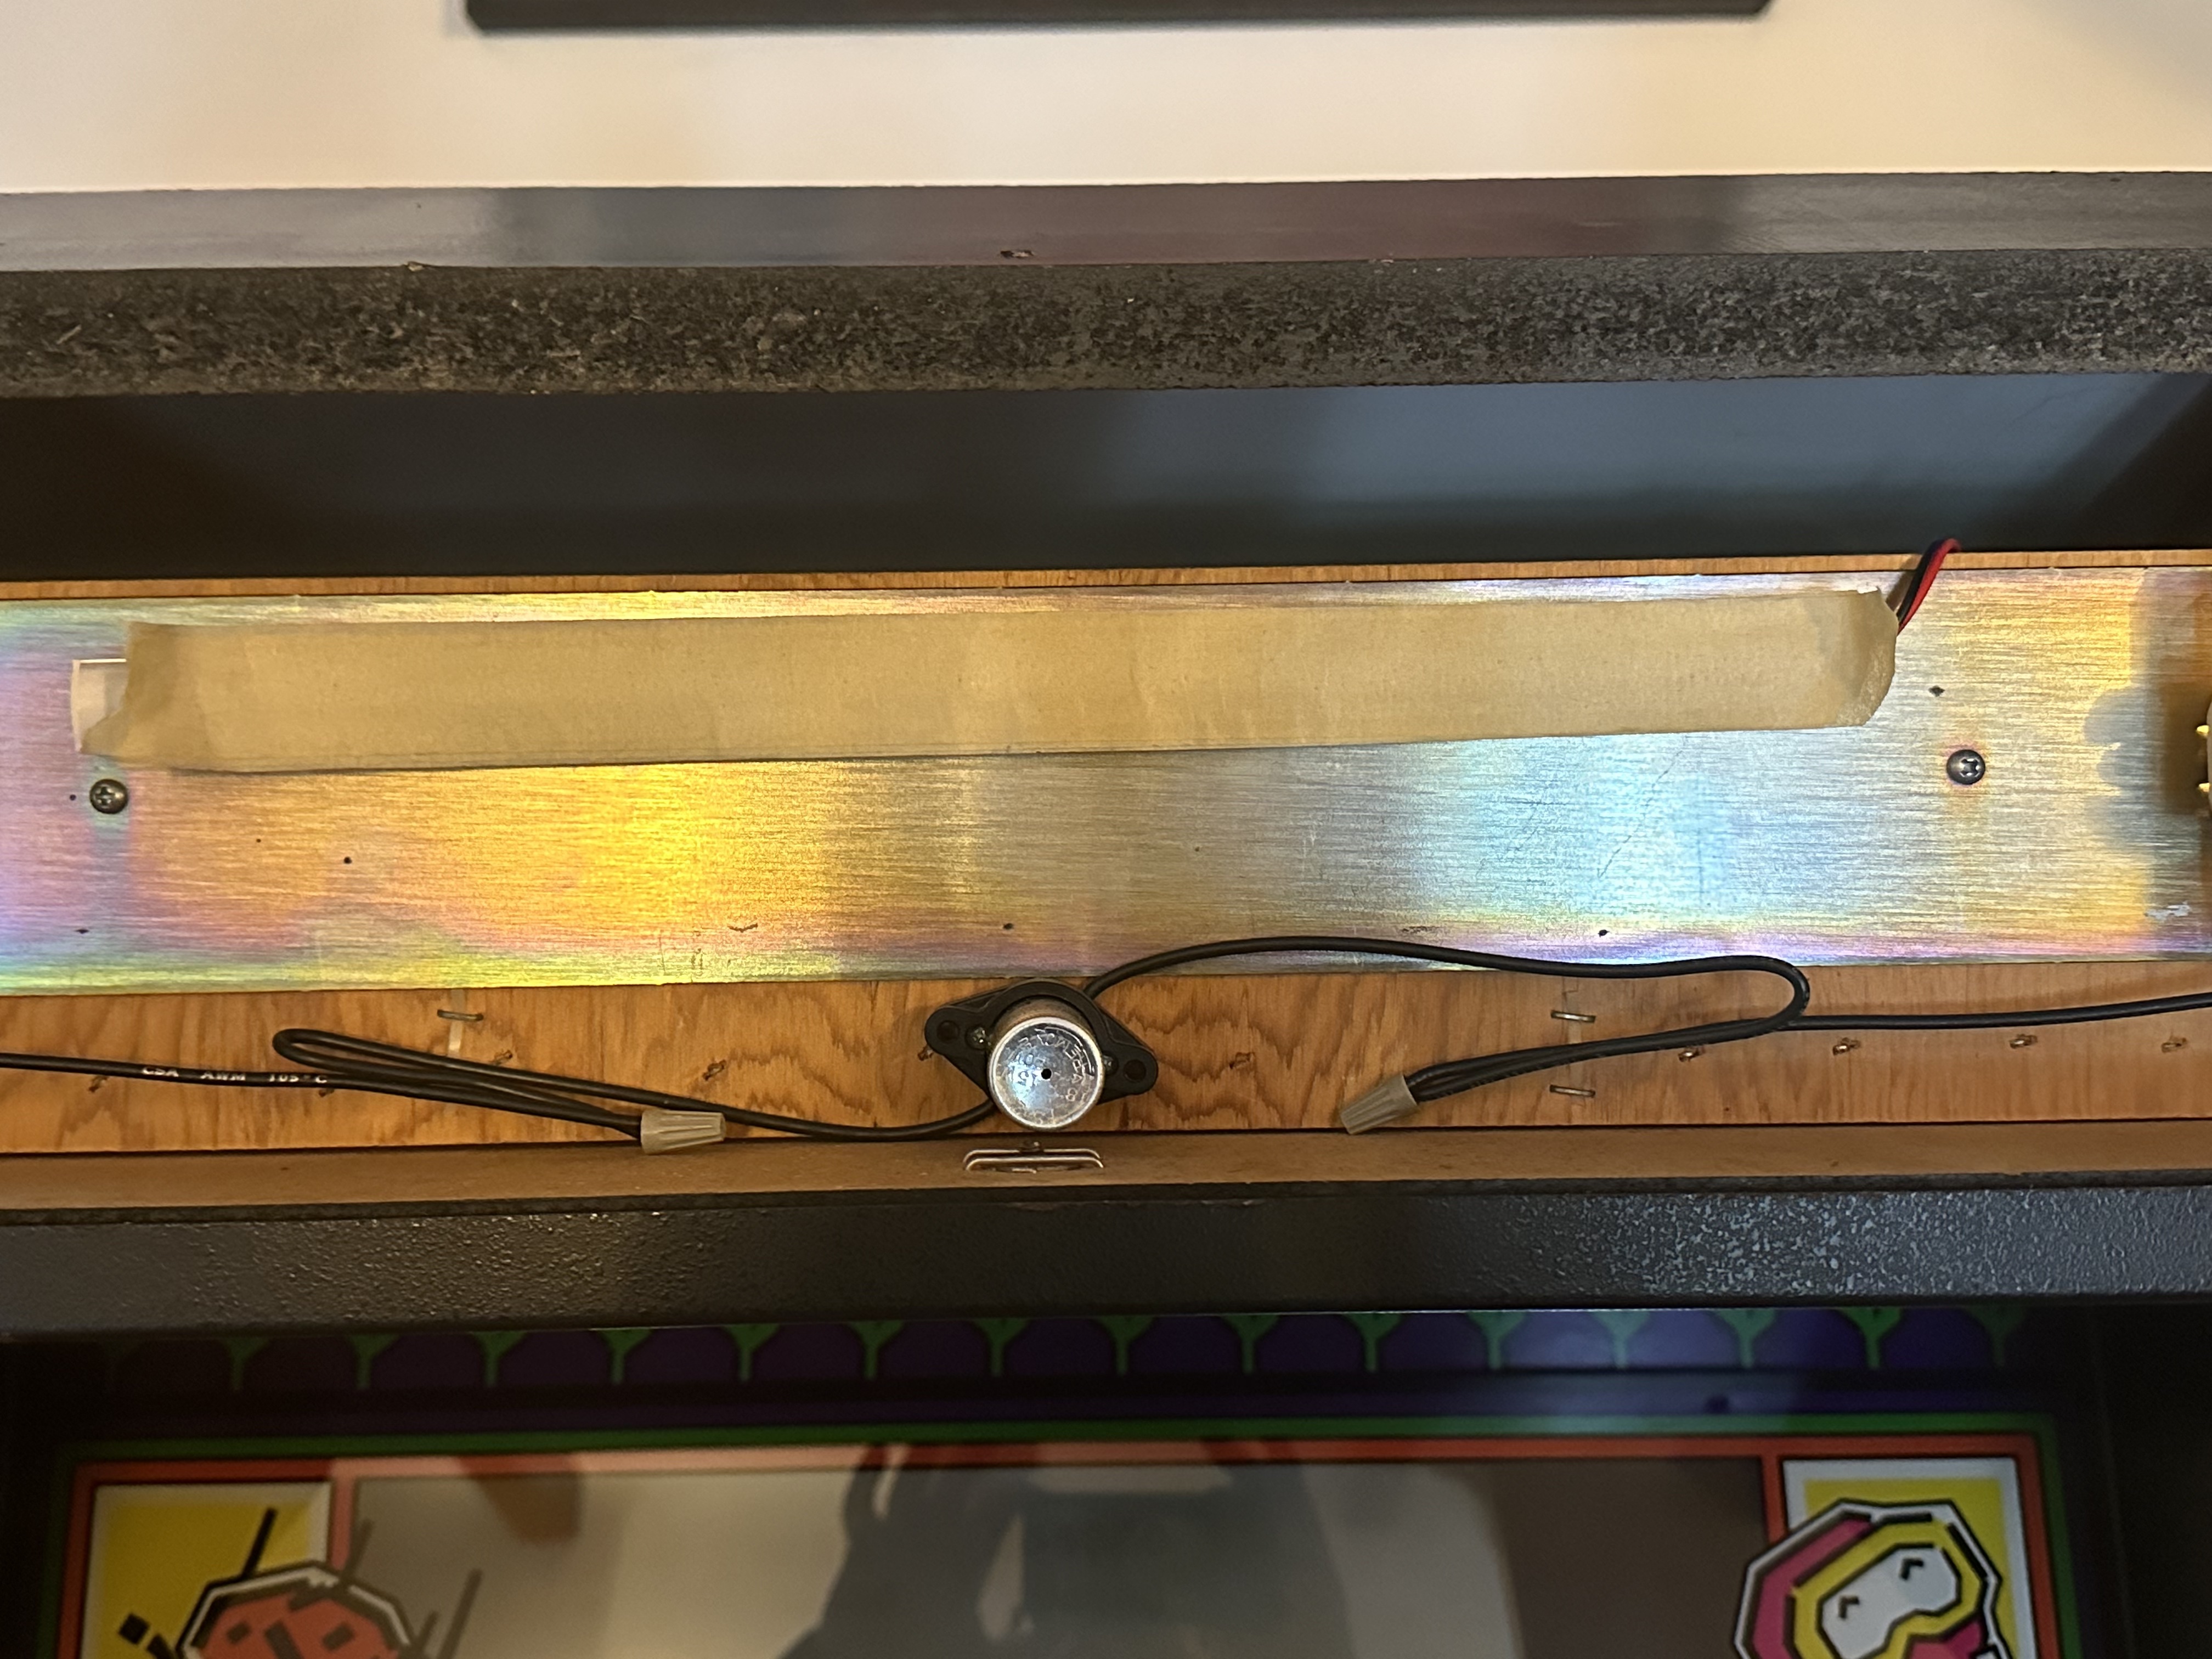
LED strip in Dig Dug marquee masked to dim light was some masking tape
That said, the marquee is now working quite well, and it is an original glass, not pasltic, marquee, which is extra special:
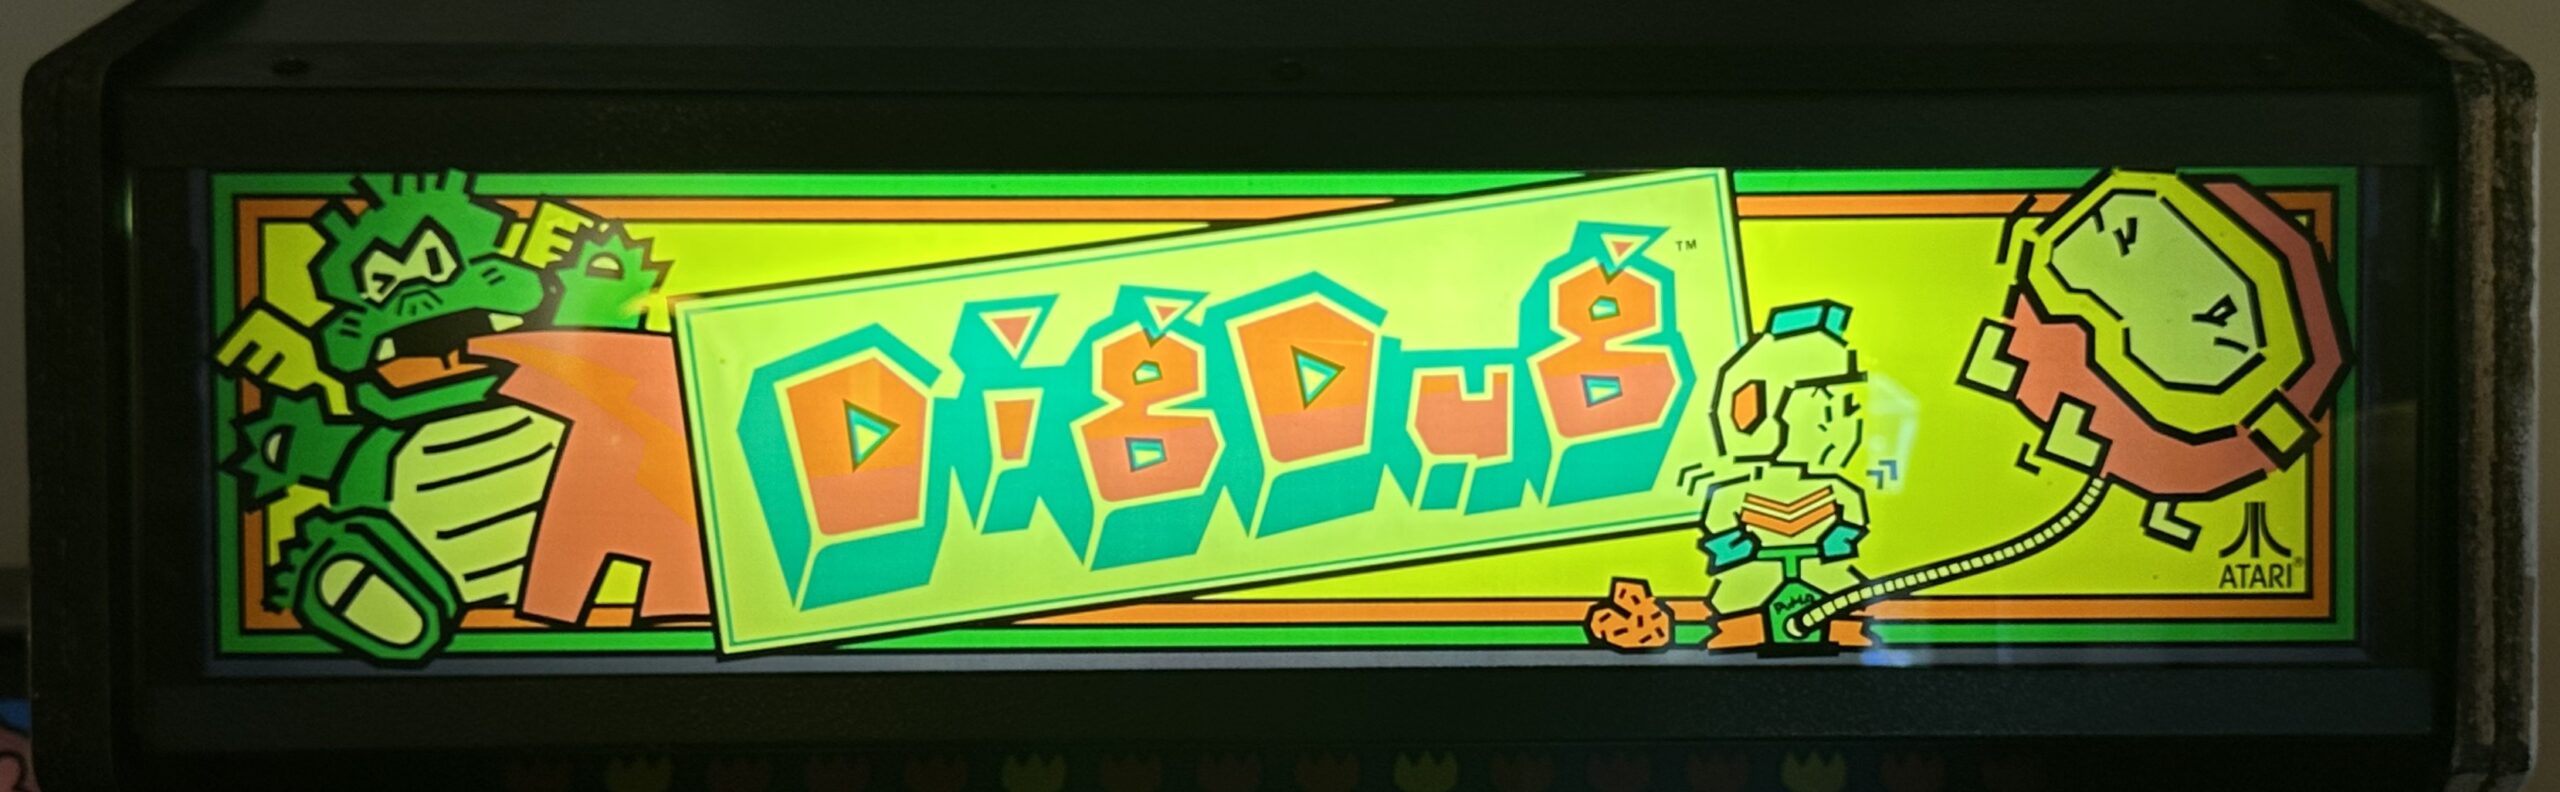
Dig Dug marquee lit up
Next up, the power brick was pretty noisy, so I thought it might be a big blue cap that needed to be replaced. It’s an easy job, so I brought a couple back from America and swapped out the existing one. Unfortunately the noise persisted, so in the interim I switched the power prick from Millipede, which is dead quiet, with the one from Dig Dug. I did this not only because Dig Dug is in the foyer and the noise can get annoying, but also because Millipede is next game up for a quick refurbish and wheels. While Alberto is working on Millipede, I’ll see if I can figure out what is making the loud humming noise on the Dig Dug brick.
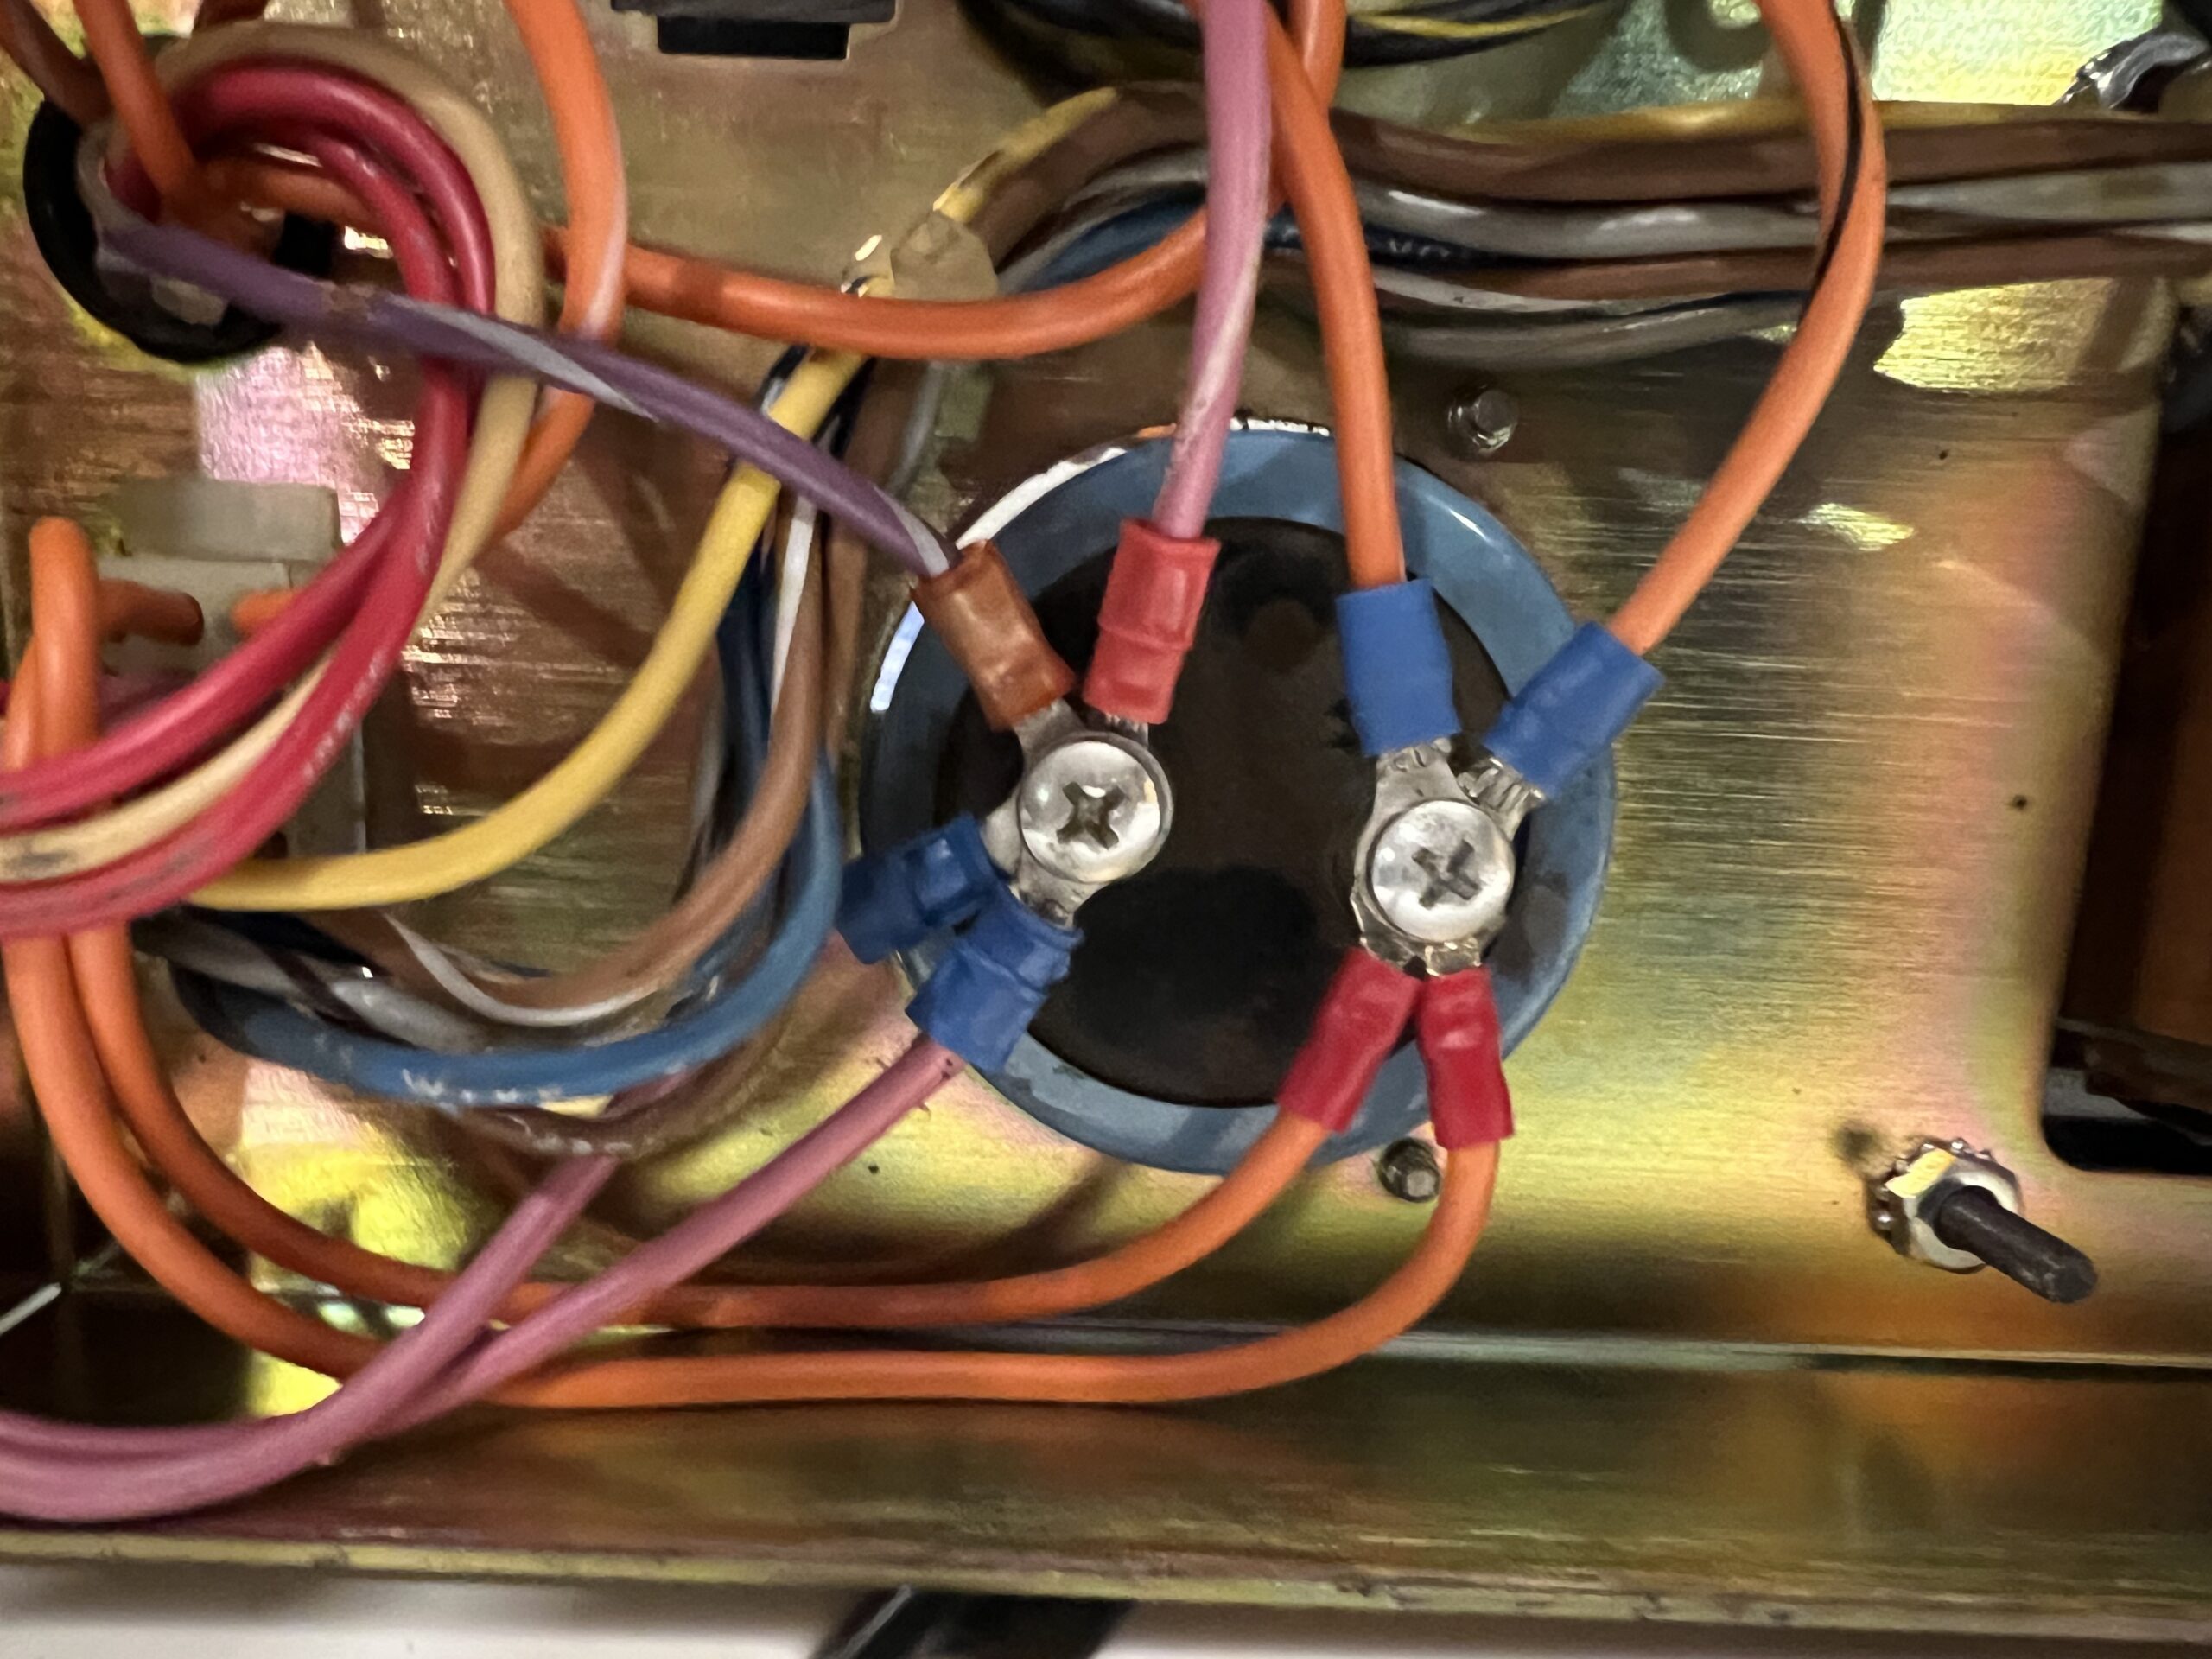
Wiring for a Big Blue cap on an Atari power brick for Dig Dug
Finally, the smooth, black t-molding is on order, and should arrive soon. But apart from that, this is another mint cabinet that sits alongside Donkey Kong Jr, Galaxian, and Pac-man in the bavamanse foyer!
![]()
Dig Dug is re-assembled and looking groovy
![]()
The bavacade Exidy Venture cabinet fully operational
I was beginning to think I would never see this game running. When we bought it for $400 over two years ago, I knew it was going to be a project. It’s a game that doesn’t really come available all too often, and a good condition working cabinet is not only hard to find, but also fairly expensive. The only working example I’ve seen since my childhood was at the Terminal in Nashville, and it was in pretty rough shape and played terribly.
![]()
Broken upper-back corner of Exidy Venture cabinet that was fixed by Alberto
The first thing we needed to do was get the cabinet in good condition. The top-back corner of the cabinet was broken, and the back door and lower portion were falling apart—old, deteriorating wood glue was the only material holding this thing together. It was in pretty rough shape; it had been neglected for probably 30+ years, and it showed with dead leaves staining the cabinet floor. Alberto took this one and worked his magic, he sent me a bunch of images of the work as he did it, and I really love to see the process visually….
![]()
![]()
![]()
![]()
![]()
Once I had it back from Alberto I had to paint the cabinet white. I did the first couple of coats with a matte white, and I still want to do a final coat with glossy, but before I did that I needed to re-assemble the cabinet because the power supply guru Roberto was coming by to bring the re-built (for the second time) original power supply that can’t be easily replaced with a switching power supply given it uses hi and lo +12V and -12V for the sound board, which also helps power the video. This power supply has been a beast, so given Roberto was coming with a fixed unit I was thrilled, but when he arrived he noted that the -5V was not working, so we (royal) added a rectifier bridge for -5V that was pretty cool:
![]()
-5V Rectifier for Venture
![]()
-5V Rectifier for Venture connected to Ground and -5V from power supply
![]()
-5v from rectifier to board
We tried that and the board was now getting -5V, which was a win. But, but, but, for some reason the +5V was not getting to the board cleanly anymore. I was depressed, I really thought we were going to finally cut through this Gordian knot of a game. But despair is not an option, so we re-grouped and re-traced everything again, ensuring the edge connectors were attached correctly (they were), and still no dice for the +5V, although every other voltage was arriving to the boards as expected, so it was at least isolated to +5V.
![]()
Venture‘s edge connectors connected correctly
As a last ditch effort we decided to install a switching power supply to get the +5V to the board to see if that will work….and it did, dear reader! It was a moment that had been a long time coming, but bringing a game back from the dead that I’d not seen working since we got it was amazingly rewarding.
![]()
Venture Switching Power Supply for +5V
I can now take the -5V rectifier and use the switching power supply for that, but it is pretty cool to see how the rectifier works, that is yet another thing that enthralls me about electricity, all these gadgets to control and temper the flow of energy are truly amazing, and I’m reminded once again it’s always power with these games.
The Venture board I bought worked perfectly and the monitor is gorgeous. I do need to try a cap kit on the K4600 monitor chassis for Venture given it’s not working, so the current chassis is on loan from Galaxian. The other bit is I need to clean-up and possibly re-build the the 8-way joystick. It is a bit of a rat’s nest right now, and it could use some new leafs and general TLC. But, the good news is Venture is on wheels, cleaned-up beautifully, and working a treat!
Enlarge / It took a lot of work for Ellie and Riley to play Mortal Kombat II in The Last of Us—and somehow just as much work, if not more, to be able to film it. (credit: HBO)
The Last of Us' HBO series went to great lengths to re-create a 2003 mall arcade for a recent episode. Two of the arcade enthusiasts hired on for that scene have detailed the triumphs and technical limitations they encountered, at length, in an arcade history forum thread.
In the HBO adaptation of The Last of Us, a cordyceps outbreak overtakes the world in 2003, leaving things much as they were in the 2023 world through which Joel and Ellie struggle. In episode 7, a flashback shows Ellie and a friend powering up and exploring an early-aughts mall, complete with a beautifully neon-lit arcade, left just as it was during the first George W. Bush administration.
The arcade scene in episode 7 of The Last of Us.
Production designer John Paino told Variety that "Raja's Arcade" took its name and frontal appearance from the game's Left Behind DLC, but otherwise the production team built it from scratch. All the games had to actually work because creators Craig Mazin and Neil Druckmann demanded it, according to Paino. But the original games would have had cathode-ray tube (CRT) screens, which—as anybody using a camera back then would remember—can be difficult to capture. "We rebuilt them on LED screens," Paino told Variety.
It’s been busy in the bavacade the last several weeks as I prepared for a trip
back to the US of A. I’ve been racing against the clock to figure out what I need to bring back for the various games, which means a lot of testing to try and get things working, or establish they’re beyond my repair capabilities, which means shipping them out.
![]()
Troubleshooting Cheyenne Monitor
The process of trying to diagnose has become more and more fun for me as I gain a modicum of insight. I have finally found a hobby I can really sink my teeth into, which is quite rewarding. I’m still in the process of re-organizing the bavacrypt so that my old, open area office space is transformed into a full blown workspace for the games, which also means a lot of storage for parts, chassis, and other sundries. I also got some shelving to start storing my toys, VHS tapes, parts, and much more.
![]()
Glimpse of shelving behind Asterock
What’s more, I’ve moved my Reclaim Hosting office into what was the basement guest room, and it’s working much better for calls, video recording, streaming, etc., thanks to better acoustics—not to mention much less doorbell interference. Once I get back from America I should be able to put the final touches on the office transition. I’ll also be sure to document that in more detail, because I really have built a dream space that is an all-in-one office/workshop/80s arcade. Have I mentioned on this blog already that creating spaces might be my other hobby passion these days? — it’s what I might miss most about Reclaim Arcade, imagining that space with Tim was an absolute joy.
Anyway, on to the repair log, and there is a lot to mention here.
![]()
![]()
Broken corner in Dig Dug cabinet
There was a big gouge in the bottom rear corner of the Dig Dug cabinet that was bothering me to no end. The cabinet was otherwise quite solid, and I have to say the seller ensured everything in it was original, which is always nice. One thing that struck me when taking this apart was how well designed the Atari cabinets are. This was the first one I disassembled, and it was the easiest yet by far. I love the way the light and speaker are combined onto one piece of plywood for easy remove.
![]()
Light and speaker mounted unit for Dig Dug cabinet
The coin door setup is also super easy to remove with a genius design that allows you to attach and detach the coin box easily and tighten the door with all bolts seated using attached, movable nuts. When you disassemble enough of these machines you begin to appreciate good design choices.
![]()
Bolt system for coin doors of Dig Dug cabinet
The cabinet work was a bit more straightforward. Epoxy for the gouged lower corner and for the various imperfections along the trim. I have new t-molding on order, so this should be golden.
![]()
Some taping of Dig Dug for touch-up paint
There were a few places the cracks in the sides meant I needed to do some touch-up paint work, and the base color of his cabinet is closer to off-white than pure white, so I found myself adding yellow to pure white paint to get a closer match, and that was fun. It’s not perfect, but you would need to know what you are looking for in just a few spots to see the difference. It is near perfect, so more than passable. Also, none of the original artwork was touched, so this was already a pretty impressive cabinet, we just made it awesomer!
![]()
Dig Dug After touch-up paint and before light sanding
There are a couple of things I still need to attend to, including fixing the marquee light that blows every florescent tube I put in there—I believe it’s the ballast, but need to test this. Also, the power brick is pretty noisy, and I think that might be a big blue cap that needs to be replaced, so ordering that. Finally, the smooth, black t-molding is on order, and should be ready once I get back. But apart from that, this is another mint cabinet that sits alongside Donkey Kong Jr, Galaxian, and Pac-man in the bavamanse foyer!
![]()
Dig Dug is re-assembled and looking groovy
![]()
I was beginning to think I would never see this game running. When we bought it for $400 over two years ago, I knew it was going to be a project. It’s a game that doesn’t really come available all that often, and a good condition working cabinet is not only hard to find, but also relatively expensive. The only one I ever saw since my childhood was at the Terminal in Nashville, and it was in pretty rough shape and played terribly.
![]()
The first thing we needed to do was get the cabinet in good condition. The top-back corner of the cabinet was broken, and the back door and lower portion were falling apart—old, deteriorating wood glue was holding this thing together. It was in pretty rough shape; it had been neglected for probably 30+ years, and it showed. Alberto took this one and worked his magic, he sent me a bunch of images of the work, and I really love to see the process visually….
![]()
![]()
![]()
![]()
![]()
Once I had it back from Alberto I had to paint the cabinet white. I did the first couple of coats with a matte white, and I still want to do a final coat with glossy, but before I did that I needed to re-assemble the cabinet because the power supply guru Roberto was coming by to bring the re-built (for the second time) original power supply that can’t be simply replaced by a switching power supply given it uses hi and lo +12V and -12V for the sound board, which also helps power the video. This power supply has been a beast, so given Roberto was coming with a fixed unit I was thrilled, but when he arrived he noted that the -5V was not working, so we (royal) added a rectifier bridge for -5V that was pretty cool:
![]()
-5V Rectifier for Venture
![]()
-5V Rectifier for Venture connected to Ground and -5V from power supply
![]()
-5v from rectifier to board
We tried that and the board was now getting -5V, which was a win. But, but, but for some reason the +5V was not getting to the board cleanly. I was depressed, I really thought we were going to finally cut through this Gordian knot of a game. But despair is not an option, so we re-grouped and re-traced everything again, ensuring the edge connectors were attached correctly (they were), and still no dice for the +5V, although every other voltage was arriving to the boards as expected, so it was at least isolated to +5V.
![]()
Venture‘s edge connectors connected correctly
As a last ditch effort we decided to install a switching power supply to get the +5V to the board to see if that will work….and it did, dear reader! It was a moment that had been a long time coming, but bringing a game back from the dead that I’d not seen working since we got it was amazing.
![]()
Venture Switching Power Supply for +5V
I can now take the -5V rectifier and use the switching power supply for that, but it is pretty cool to see how the rectifier works, that is yet another thing that enthralls me about electricity, all these gadgets to control and temper the flow of energy is truly amazing, and I am reminded once again it is always power with these games.
The Venture board I bought worked perfectly, and the monitor is gorgeous, I do need to try a cap kit on the K4600 monitor chassis for Venture given it’s not working, so the current chassis is on loan from Galaxian. The other bit is I need to clean-up and possibly re-build the the 8-way joystick. It is a bit of a rat’s nest right now, and it could use some new leafs and general TLC. But, the good news is Venture is on wheels, cleaned-up beautifully, and working a treat!
![]()
After fitting Pac-man with the BitKit2, I decided that cabinet needs to be on wheels and the bottom needs to be looked over closely given the floor was feeling tenuous under any kind of pressure. There were early signs of wood rot that may have been a result of water damage, although it was definitely not extensive.
![]()
Pac-man without underpants
![]()
Pac-man‘s old floor was feeling its age
I stripped it down and sent it out to Alberto and he is a genius. He replaced the floor entirely, while leaving everything else in tact, and added base pedestal to hide the new wheels. Once I got it back I taped around the original artwork and painted the cabinet with the Scramble yellow I had left-over from that project, and did some touch-up on the black paint, but otherwise left the original artwork untouched. The yellow from Scramble is a tad more subdued then the original Pac-man yellow, but you would really need to be in-the-know to realize the subtle difference. That said, I may re-paint it at some point ![]()
![]()
![]()
This was probably the fastest I ever completed a strip down, re-build, and re-paint. It was all done in less than a week, including Alberto’s work—which was crazy fast. I took a ton of photos, and you can find them in this Flickr album.
![]()
It’s looking good! I still need to paint the back of this cabinet, which was also yellow. I’ll take care of that once I return. This dot gobbler is the crown of my collection, so it needs to be beautiful!
Above are the major notes, but there continues to be ongoing weirdness with Williams’ transformers. I got back the “blown” Joust transformer that turns out was not blown after all, the surge of 220V was not detrimental to the actual transformer because the varistor prevented it from doing any harm. Once the blown varistor was removed the transformer started working again, I just need a new varistor now.

Image of a varistor
Anyway, When I put the Joust transformer into Stargate it was having issues with the Williams JROK board, it kept randomly resetting the board whenever I would touch the smart bomb button. After realizing the JROK board worked fine in another cabinet (Defender), I figured it most be a power issue. After seeing the switching power supply values were all reading fine, I decided to put all of transformers back in their original games (I had them labeled).* That seems to have solved the issue, but we will see.
![]()
Hanterex Polo 20″ chassis are my bane, and Cheyenne is now the only game not working. I am sending that chassis out for repair given I do not have a capkit, and hopefully that will be up and running soon.
I have the chassis removed and ready, just haven’t had time to try the K4600 CapKit. This chassis was originally in Venture, but if all goes well will be in Galaxian.
Condor G07 Capkit -not sure whenIi will do it, but on the list.
Cable for monitor and coin door light in Asterock acting up, this has been an odd issue, and it just seems like cables in Asterock power supply are lose, and the monitor loses power, but will need to dig deeper.
Need to install high score save kits for Venture and Pac-man.
Whew, that as a lot, but I am happy cause the Reclaim retreat is about to start and now I can start my West Coast tour diary on the venerable bava.blog ![]()
_____________________________________
*I had put the Stargate transformer in Moon Patrol, the Moon Patrol transformer in Joust, and left Stargate empty until the Joust transformer one was fixed.
There's a Chuck E. Cheese family entertainment center for horror fans? Well, not really. Last November, Mixed-reality Artist Siriu$, also known as Cabel Adams, created virtual art for a "Chucky Cheese Pizza Arcade & Bowling," complete with a giant Chucky doll wielding a knife in one hand and a pepperoni pizza in the other. — Read the rest
Yesterday I started playing around with a field-programmable gate array (FPGA) board I bought a couple of months back called BitKit2. What is FPGA? It’s a circuit board technology that has been around since the 80s that is pre-assembled and allows for the programming of the hardware to happen after the fact. This technology is fairly new to me, so follow the Wikipedia link for actual informative details.
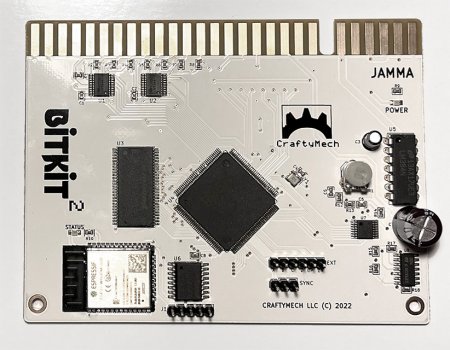
BitKit2, the latest version is white versus older red and green models
The BitKit2 is a FPGA board that has been programmed to play 50 classic video games such as Pac-man, Ms. Pac-man, Pengo, Scramble, Super Cobra, Dig Dug, Nibbler, Moon Cresta, Galaxian, Galaga, Crazy Kong, and many, many more. The board comes pre-programmed to play these games, but the ROM images (or game files) have to be sourced separately then uploaded to the board. The ROM community has been thriving for decades online thanks to emulator projects like MAME, so finding the ROMs you need to upload will not be hard. Two logical questions at this point might be: 1) why buy a BitKit2 when you already have a cabinet with the original game board?; 2) if you’re just downloading and playing ROMs from the web, isn’t it just emulation?
The answer to the first is a practical one: 40 year-old boards go bad all the time, and can be an expensive and/or time-consuming fix, so having a board that can stand-in for one of several games can be a relatively quick, cheap fix, not to mention the ability to turn any one cabinet into an instant multi-cade.
![]()
Original Pac-man game board, it is oh so beautiful
The second question is a bit more complicated. Folks who fix the original game boards also download ROMs from the web and load them on an original board’s ROM chips, so that is not necessarily the emulation piece. The difference between playing those ROMs on your computer versus a FPGA board is the ROMs are not using a dedicated, programmed board on your computer, the game hardware is virtualized. On an FPGA board the ROMs are loaded on a dedicated circuit board that is programmed hardware intended to run them as such. The FPGA boards are comparable in terms of speed and performance to the original boards (which is not the case with MAME emulators on your PC). So the real question becomes is it “as good” which can quickly become both overly technical and subjective all at once. I personally prefer the original board given I’m drawn to the illusion of a vanishing point that ends in an “original,” but I recognize the limits of that logic. When a 40 year old board is not working, I would rather have the game be up and running then refusing to change for fear of a micosecond delay in the FPGA board.*
![]()
Ok, enough of that, now let’s get to how to install the BitKit2, as well as look at how it works. The above image shows the BitKit2 (the bottom, white board) plugged into a Pac-man Jamma adapter (the top green board). Jamma adapters are purchased separately, and I picked up the one pictured from the Arcadeshop (there are others sold from Mike’s Arcade and beyond, so be sure to check which one you have). Jamma is a widely used wiring standard for arcade games that allows you to bridge the original game’s wiring with a multi-purpose board like the BitKit. You’ll notice on the Pac-man Jamma board there is an additional connector coming off of it with two +12V orange wires , four +5V red wires, and four ground black wires. This connects the Pac-man Jamma board to a switching power supply,
![]()
Why does this particular Jamma adapter need a switching power supply hook-up? This is because the Pac-man board converts the AC power coming in to DC power on the board, which is not common. Most boards do this well before that using a separate transformer and power supply board.
![]()
You can see the red connectors going into +5V, orange into +12V, and black to ground on the switching power supply in the image above. I was confused that there was no -5V connectors, but I confirmed that is the case and this setup for the Pac-man Jamma board from the Arcadeshop worked perfectly for me. So, in short:
After that the BitKit2 should power on and you’ll see two green lights, one to signal power is on, and the other to signal Bluetooth is working. At this point you can now interface with that board wirelessly using your computer.† There’s a dropdown to find and connect to your Bluetooth device, it’ll be something like BK-#### (such as BK-1077) and you should be able to connect to it—if not move closer and restart the BitKit board.
![]()
You can download and install the software for the BitKit Manager which will allow you to interface with the board to update the firmware, upload and manage game ROMs, and also upload high scores to a leader board.
![]()
The Manage Games interface is akin to FTPing files to a different machine, you select the game ROM zip files, click on the arrows sending them to the BitKit, and then below that there is a “Sync Game(s)” button that will then upload them to the board over Bluetooth.
![]()
You can also remove and/or erase all games. The manage Games tabs also provide ROM details for the games you are syncing:
![]()
And the Remixes tab provide links to special edition ROMs for Scramble, Ms. Pacman, and Eyes99, which is new to me:
![]()
There is also a section to submit high scores to the leader board:
![]()
This board contains quite a few features, and begins to marry the physical, offline tech of an arcade cabinet with the web in some fun ways. The idea of accessing the board wirelessly while inside the cabinet at will (no need to move and open the 200 pound machine) is pretty awesome.
With the BitKit2 installed and ROMs uploaded, you’ll need to access the board’s menu from the actual game cabinet. You can do this by depressing the player 1 button while powering on the game.
![]()
This main menu allows you to manage the BitKit2 settings, which includes system settings, game settings, video settings, and configuring controls.
System
![]()
In System you can enable the game orientation, credit cheat, attract mode, hide options, mode, etc. The credit cheat is pretty cool, with that on whenever you press the player 2 button twice quickly you add a credit. The attract setting initiates a slide show after two minutes of idleness that highlights games available and settings.
When the Hide Options setting is off you can press the player one and two buttons to reset the board, and thereafter quickly depress the player 1 button to enter the game menu to choose a different game.
Games
![]()
The games menu gives you access to all games settings for the ROMs you uploaded:
![]()
From this menu that lists all the game ROMs uploaded you can select a specific game and change settings like number of lives, bonus lives, turbo (if an option), etc. And these are granular, so they only work on a game-by-game basis, which is a nice feature.
![]()
I am using Turbo on Pac-man and made it the game the machine boots up (there can only be one), otherwise the settings are the default. And the 40 games I have loaded all contain their own settings which is pretty impressive.
Controls
![]()
The Controls menu allows you to test your buttons to ensure they work as intended. You can also define what your reset combination is, as well as what buttons you would use to pause a game—something I appreciate given I’m often interrupted during one of my epic games that will break all the recordz.
Video
![]()
There is also a Video setting that allows you to configure the monitor to test crosshatch patterns, colors, etc. An amazing feature I discovered was the ability adjust the vertical and horizontal positioning of your game so you should not have to touch anything on the actual monitor chassis, which was a huge relief for me.
Overall, it’s a really impressive interface with a ton of options. Also look like there are regular firmware updates—as recent as last month—which gives you bug fixes, new features, etc. I wonder if there is also the capability to program and load new games going forward? Not sure given my limited understanding of the FPGA boards, but that would definitely be a cool feature.
The CraftyMech site has a manual that will take you through all the different settings I not-so-briefly described above in greater detail, so be sure to check that out. I also recorded a 10 minute video wherein I work through how mine works (there are a few corrections that I have rectified in the notes of the video):
________________________________
*That said, some games are probably harder to port to an FPGA board than others, and then there are other physical limitations like vector versus raster graphics. So not all ports are equal, but it’s possible there will be no perceivable difference between Pac-man gameplay on the original board and that on a FPGA board.
†I personally would prefer if they had a non-wireless option way as well given the Bluetooth was finicky on my newer Macbook Pro running Monterey. I did get it working with a backup Macbook Pro running Catalina.